Kaspa Made Simple: A Beginner’s Guide to Mastering Kaspa WASM SDK in the Browser
From download to full client connection, step‑by‑step guide to install the SDK, connect to a node, and start interacting with the network
Full demo with all the files can be downloaded from the minKasWasm repo on github.
The Kaspa WASM SDK can be downloaded from the Kaspa github releases here. (kaspa-wasm32-sdk-v1.0.1.zip)
Extract it and if you’re like me you’ll probably be a little overwhelmed at all the different folders/files. For this tutorial we are only focusing on getting the version that will work in browsers and has all the components together. If you extracted it to your Downloads folder you can just copy and paste this in Windows File Explorer’s URL bar and press enter:
%USERPROFILE%\Downloads\kaspa-wasm32-sdk-v1.0.1\kaspa-wasm32-sdk\web\kaspaOnce you’re at “kaspa-wasm32-sdk\web\kaspa”, then you just need to grab the kaspa.js and kaspa_bg.wasm files.
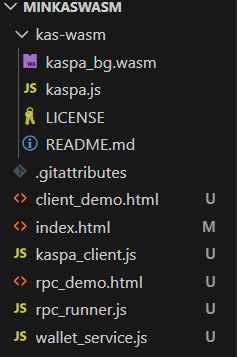
For this project, I have a root folder named “minKasWasm” with one folder for the Kaspa WASM SDK named “kas-wasm”.
Client Connection
First we need to connect to a Kaspa node. This can be done by one of two ways:
Connect directly to a node using its ip:port
Use the built-in resolver to connect to a public node
If you connect to a public node then it usually takes quite a bit longer to actually connect and it is entirely possible the node operator has limited the data you can get. For instance, instead of getting every single block that is added as it comes into the network, they could only provide 1 block every second. Fair enough, since it is public and if you’re using it then you’re freeloading.
Which is why it is strongly recommended that you run your own node. Then you can either make it public and help yourself and freeloaders, or keep it private so only you can use it. If you need help setting up a node you can follow along with: Kaspa Node Setup on Windows: A Complete Step‑by‑Step Guide.
Edit (1/8/26): To enable auto reconnections add “ConnectStrategy” to the import and add connectOptions when connecting. So, it will look like:
import initKaspa, { RpcClient, Resolver, ConnectStrategy } from '../kas-wasm/kaspa.js'; const connectOptions = {
blockAsyncConnect: true,
retryInterval: 2000, // retry every 2s if needed
strategy: ConnectStrategy.Persistent,
timeoutDuration: 10000 // fail after 10s
};
// 3. Connect
try {
await newClient.connect(connectOptions);
} catch (err) {
console.error("Connect failed:", err);
throw err;
}Here’s a complete coding example you can drop into your project to get connected:
// kaspa_client.js
import initKaspa, { RpcClient, Resolver } from '../kas-wasm/kaspa.js';
// Either 1. ensure you put the actual Kaspa WASM SDK in a folder named "kas-wasm" outside of the folder this file is in, or 2. point to where you have the Kaspa WASM SDK

let client = null;
let wasmInitialized = false;
let currentRpcUrl = null;
let currentNetworkId = null;
let reconnecting = false;

export async function connect(rpcUrl, networkId = "mainnet", { onDisconnect } = {}) {
  // Initialize Kaspa wasm sdk once
  if (!wasmInitialized) {
    await initKaspa();
    wasmInitialized = true;
  }

  // 1. Shut down existing client
  if (client) {
    try {
      await client.disconnect();
    } catch (e) {
      console.warn("Cleanup error:", e);
    }
    client = null;
  }

  // Store connection details for reconnect
  currentRpcUrl = rpcUrl;
  currentNetworkId = networkId;

  // 2. Set options
  const options = {
    networkId: networkId,
    resolver: rpcUrl ? undefined : new Resolver(),
    url: rpcUrl || undefined
  };

  const newClient = new RpcClient(options);

  // 3. Connect
  await newClient.connect();

  // Assign to singleton AFTER successful connection
  client = newClient;

  // Subscribe to disconnect event for auto-reconnect
  if (client && typeof client.on === 'function') {
    client.on('disconnect', async () => {
      if (reconnecting) return;
      reconnecting = true;
      if (onDisconnect) onDisconnect();
      try {
        client = await connect(currentRpcUrl, currentNetworkId, { onDisconnect });
        reconnecting = false;
      } catch (err) {
        reconnecting = false;
        // Optionally, emit a global event or log error
        throw err;
      }
    });
  }
  return client;
}
Then you can create the GUI portion, or create a simple index.html with a button to connect and show a status message:
<!DOCTYPE html>
<html lang="en">
<head>
  <meta charset="UTF-8">
  <title>Kaspa Connect Demo</title>
</head>
<body>
  <button id="connectBtn">Connect</button>
  <p id="status">Not connected</p>

  <script type="module">
    import { connect } from './kaspa_client.js'; // Ensure this file is in the same folder as kaspa_client.js or put it outside the folder and change this to '../kaspa_client.js'

    const btn = document.getElementById('connectBtn');
    const status = document.getElementById('status');

    btn.addEventListener('click', async () => {
      status.textContent = "Connecting...";
      try {
        const client = await connect(null, "mainnet", {
          onDisconnect: () => {
            status.textContent = "Disconnected";
          }
        });
        status.textContent = "Connected";
      } catch (err) {
        status.textContent = "Connection failed: " + err.message;
      }
    });
  </script>
</body>
</html>
RPC Calls
Next, you could try making some RPC calls to the node you’re connected to. Instead of just coding a bunch of RPC functions for all the different ones available to the node, I’ve created this dynamic function so we can simply call any of them we want by name with parameters if needed.
// rpc_runner.js
export async function runRpcCommand(client, cmdText) {
  if (!client || !client.isConnected) {
    return "Not connected to any RPC";
  }

  try {
    if (!cmdText) return "No command provided";
    const cmd = JSON.parse(cmdText);

    const methodName = cmd.method;
    const params = cmd.params || {};

    if (typeof client[methodName] !== "function") {
      return `Method ${methodName} not found on RpcClient`;
    }

    const result = await client[methodName](params);

    if (typeof result === "object") {
      return Object.entries(result)
        .map(([k, v]) => `${k}: ${v}`)
        .join("\n");
    } else {
      return String(result);
    }
  } catch (err) {
    console.error("[RpcRunner] Error running RPC command:", err);
    return "Error: " + err;
  }
}
Now you just need a textbox and you can enter RPC calls like:
{"method":"getSinkBlueScore","params":{}}So, if we add this to our previous index.html example. Then the complete demo looks like this:
<!DOCTYPE html>
<html lang="en">
<head>
  <meta charset="UTF-8">
  <title>Kaspa RPC Demo</title>
</head>
<body>
  <button id="connectBtn">Connect</button>
  <p id="status">Not connected</p>

  <h2>Run RPC Command</h2>
  <input id="rpcCommand" type="text" size="50" value='{"method":"getInfo","params":{}}'>
  <button id="runRpcBtn">Run</button>
  <pre id="rpcResult"></pre>

  <script type="module">
    import { connect } from './kaspa_client.js';
    import { runRpcCommand } from './rpc_runner.js';

    let client = null;

    const status = document.getElementById('status');
    const connectBtn = document.getElementById('connectBtn');
    const runBtn = document.getElementById('runRpcBtn');
    const rpcInput = document.getElementById('rpcCommand');
    const rpcResult = document.getElementById('rpcResult');

    connectBtn.addEventListener('click', async () => {
      status.textContent = "Connecting...";
      try {
        client = await connect(null, "mainnet", {
          onDisconnect: () => {
            status.textContent = "Disconnected";
          }
        });
        status.textContent = "Connected";
      } catch (err) {
        status.textContent = "Connection failed: " + err.message;
      }
    });

    runBtn.addEventListener('click', async () => {
      const cmdText = rpcInput.value.trim();
      const result = await runRpcCommand(client, cmdText);
      rpcResult.textContent = result;
    });
  </script>
</body>
</html>
Now you can start to do some really cool interactions with the Kaspa network. Visit the official Kaspa WASM SDK documentation website here and scroll down to see a list of all the different methods you can try out.
Wallets
At this point you’re probably wanting to start using wallets and sending transactions. This part took me quite awhile to finally understand, even with AI. Most importantly, you need to understand the Wallet’s lifecycle.
Wallet Lifecycle (short form):
Construct wallet with proper options
Create or import mnemonic
Create wallet file
Open wallet
Insert mnemonic key
Create a default account
Create the first receive address
Connect and start the wallet
Activate account
Return address and mnemonic to show user and ensure they back it up
Something that confused me is you can have a Kaspa client connected to one node and the Wallet connected to another node, but the best practice for most apps is to share one RpcClient instance and inject it into both wallet and any other modules that need it. That way you guarantee consistent chain state and minimize redundant connections.
However, if you deliberately want redundancy or separation (e.g. wallet on a private node, scanner on a public one), the architecture does allow it, but I highly recommend against this unless you really know what you’re doing as I noticed some issues with connections/variables becoming stale/etc.
Here’s a complete example that requires a Kaspa client, network ID, and password with optional filename, user hint, and user supplied mnemonic for importing. You must first initialize the new Wallet() in a separate function. I tried putting it all into one function and it refused to work. Little nuances like this really tripped me up so hopefully this helps you.
// wallet_service.js
import {
  Wallet,
  Mnemonic,
  kaspaToSompi,
  sompiToKaspaString,
  AccountKind,
  AccountsDiscoveryKind,
  Address
} from './kas-wasm/kaspa.js';

let wallet = null;
let walletInitialized = false;
let walletSecret = null;
let accountId = null;

export function init(rpcClient, networkId) {

  if (walletInitialized) return;

  // 1. Construct wallet with proper options
  wallet = new Wallet({
    resident: false,
    networkId,
    resolver: rpcClient.resolver || undefined
  });

  // Add the balance event listener to update balance on changes
  wallet.addEventListener("balance", (event) => {

    const bal = event?.data?.balance;

    if (bal && typeof bal.mature !== "undefined") {

      const matureBalance = sompiToKaspaString(bal.mature);

      // You can update your UI or call a callback here
      console.log("Balance changed:", matureBalance, "KAS");

      // Example: update a DOM element
      const balanceResult = document.getElementById("balanceResult");

      if (balanceResult) {
        balanceResult.textContent = `Balance:\n${matureBalance} KAS`;
      }
    }
  });

  walletInitialized = true;
}

export async function createWallet({ password, filename = "default_wallet", userHint = "", mnemonic = null }) {

  if (!walletInitialized) {
    throw new Error("Wallet not initialized. Call init() first.");
  }

  walletSecret = password;

  // 2. Create or import mnemonic
  const mnemonicPhrase = mnemonic || Mnemonic.random().phrase;

  // 3. Create wallet file
  const descriptor = await wallet.walletCreate({
    filename,
    overwriteWalletStorage: true,
    title: filename,
    userHint,
    walletSecret: password
  });

  // 4. Open wallet
  await wallet.walletOpen({ filename, walletSecret: password });

  // 5. Insert mnemonic key
  const prvKey = await wallet.prvKeyDataCreate({
    kind: "mnemonic",
    mnemonic: mnemonicPhrase,
    walletSecret: password
  });

  // 6. Create default account
  const account = await wallet.accountsEnsureDefault({
    walletSecret: password,
    type: new AccountKind('bip32')
  });

  accountId = account.accountDescriptor.accountId;

  // 7. Get first receive address
  const addr = await wallet.accountsCreateNewAddress({
    accountId: account.accountDescriptor.accountId,
    addressKind: "receive"
  });

  // 8. Connect and start wallet
  await wallet.connect();
  await wallet.start();

  // 9. Perform accounts discovery to sync with network if you are importing existing wallet
  await wallet.accountsDiscovery({
    accountScanExtent: 5,              // scan first 5 accounts
    addressScanExtent: 5,             // scan first 5 addresses per account
    bip39_mnemonic: mnemonicPhrase,
    discoveryKind: AccountsDiscoveryKind.BIP44
  });

  // Activate account to enable balance tracking
  await wallet.accountsActivate({ accountId });

  // Return mnemonic for backup
  return {mnemonic:mnemonicPhrase, address: account.accountDescriptor.receiveAddress};
}
Send Transactions
Here is the core function for sending a transaction. I’ve also added some minor safeguards like ensuring the wallet has enough funds to even send a transaction. There are helper functions to handle the payload, which is not just plain text. It is actually hex, so it must be encoded/decoded and there is a size limit of ~32kb.
export async function send({ amount, toAddress, payload, priorityFeeKas }) {

  if (!walletInitialized || !wallet) {
    throw new Error("Wallet not initialized. Call init() first.");
  }

  // Determine priority fee:
  // - If custom fee provided: use it as extra priority fee on top of base network fee
  // - If no custom fee: use 0 (dust-floor / minimum required by network based on mass)
  // - Smallest amount I've seen send successfully is 0.0000019 KAS without any payload
  let priorityFeeSompi = 0n;
  if(priorityFeeKas > 0) {
    priorityFeeSompi = kaspaToSompi(priorityFeeKas);
  }

  // Check balance
  let spendable;
  spendable = await getSpendableBalance();

  // Convert amount to sompi and ensure BigInt
  let amountSompi;
    amountSompi = kaspaToSompi(amount.toString());
    if (amountSompi <= 0n) {
      throw new Error("Amount must be greater than zero.");
    }

  // Ensure priorityFeeSompi is BigInt
  let priorityFeeSompiChecked = priorityFeeSompi;
  if (typeof priorityFeeSompiChecked !== "bigint") {
    priorityFeeSompiChecked = BigInt(priorityFeeSompiChecked);
  }

  // Calculate required total and check against spendable
  let required;
  required = amountSompi + priorityFeeSompiChecked;
  if (spendable < required) {
    throw new Error(
      `Insufficient funds: required ${required.toString()}, available ${spendable.toString()}`
    );
  }

  // Convert address string to Address object
  let addressObj = toAddress;
  if (typeof toAddress === "string") {
    addressObj = new Address(toAddress);
  }

  // Build request - priorityFeeSompi is extra fee on top of the base network fee
  const sendRequest = {
    walletSecret: walletSecret,
    accountId: accountId,
    priorityFeeSompi: priorityFeeSompiChecked,
    destination: [{
      address: addressObj,
      amount: amountSompi
    }]
  };

  // Payload
  if (payload) {
    if (!validatePayload(payload)) {
      throw new Error('Payload must be a string and <= 32KB');
    }
    const hex = stringToHex(payload);
    if (hex.length % 2 !== 0) {
      throw new Error('Invalid hex payload');
    }
    if (hex.length / 2 > 32 * 1024) {
      throw new Error('Payload too large');
    }
    sendRequest.payload = hex;
  }

  try {
    return await wallet.accountsSend(sendRequest);
  } catch (err) {
    throw new Error('Transaction failed', err);
  }
}
Now go create something awesome! I’d really like to see someone make an app so I can host static web pages directly on Kaspa, or an Unreal Engine plugin so game devs can start utilizing Kaspa and create games that can use cryptography to prove if someone is cheating or not. Use crypto message signing for offline moves, anchor them every so often to Kaspa. Now gaming is fun again :)